Guide · macOS
How to record your screen
on a Mac — three ways
macOS ships with two ways to record your screen, and both are fine — until you need system audio or want to share the result. Here's how each one works, and when to reach for something better.
The quick answer
Press Cmd + Shift + 5.
Every Mac has a screen recorder built in. Press Cmd + Shift + 5 and a toolbar appears with options to record the entire screen or a selected portion. It saves a .mov file to your Desktop, and for a quick, silent clip that's all you need.
The catches show up fast, though: it can't capture the sound your Mac is playing, and you're left with a file you still have to upload somewhere before anyone else can watch it. The three options below go from simplest to most capable.
How it works
Option 1 — the built-in toolbar (Cmd + Shift + 5)
Open the toolbar
Press Cmd + Shift + 5. Choose "Record Entire Screen" or "Record Selected Portion" and drag the frame if you picked a portion.
Set your options
Under Options, pick your microphone if you want narration, and choose where the file saves. There is no system-audio option — that's a macOS limitation.
Record and stop
Click Record. When you're done, click the stop button in the menu bar. The .mov lands on your Desktop, ready to be trimmed in QuickTime or uploaded by hand.
How it works
Option 2 — QuickTime Player
Start a new recording
Open QuickTime Player and choose File → New Screen Recording. It uses the same recording engine as the toolbar, with the same controls.
Pick mic and area
Choose your microphone from Options and record the full screen or a portion. As with the toolbar, system audio isn't available without a third-party virtual audio driver.
Save the file
Stop from the menu bar, then save the .mov wherever you like. QuickTime can trim the ends, but that's the extent of the editing.
The gap
Built-in tools record. They don't share.
Both built-in options have the same two blind spots. First, no system audio: anything your Mac plays — a call, a bug with sound, a video — simply isn't in the recording unless you install and configure a virtual audio driver. Second, they end at a file: to show anyone, you still have to upload the .mov to a drive or chat, wait for it, and hope the receiver's preview can play it.
If the whole point of your recording is that someone else watches it, that upload step is the actual cost — and it's the step a sharing-first recorder removes.
How it works
Option 3 — Qumra: record straight to a share link
Install and hit record
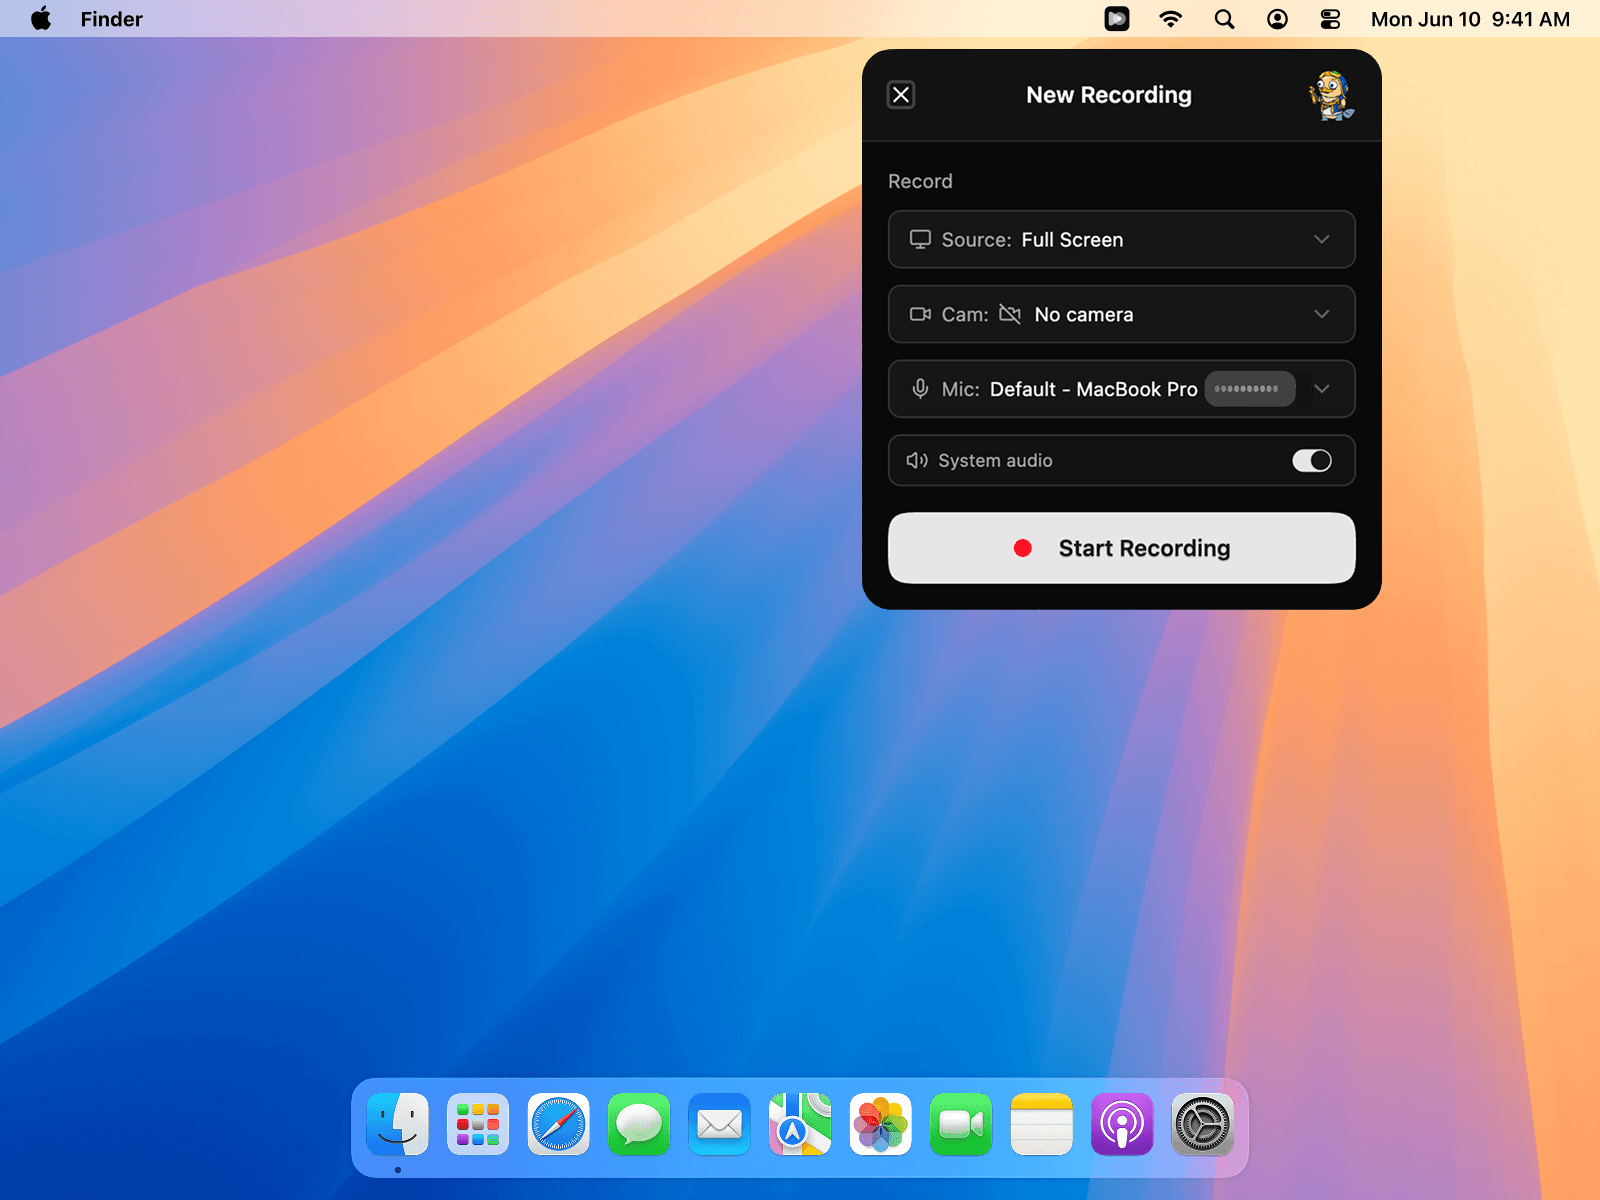
Download Qumra (native builds for Apple Silicon and Intel), grant the one-time screen-recording permission, and capture your full screen, a window, or a region — with system audio and your camera when you want them.
Stop — the link is ready
Uploading happens while you record, so the moment you stop, your share link is ready to paste anywhere. No file, no export, no waiting.
Let people watch and reply
Viewers open the link in any browser — no account or install — and can leave comments pinned to exact timestamps. Every recording is transcribed automatically.
Why the third option
What Qumra adds over the built-ins.
System audio, no drivers
The sound your Mac plays is captured alongside your mic — no virtual audio device to install or configure.
A link, not a .mov
The upload happens during the recording. Stop, paste the link, done.
Camera when it helps
Add your camera as picture-in-picture, or record either source on its own.
Automatic transcript
Every recording is transcribed, so it's skimmable as text and searchable later.
Comments at timestamps
Viewers reply at the exact moment they mean, turning a recording into a conversation.
Free to start
The free plan covers up to 30 recordings of 5 minutes each — enough to make it a habit.
FAQ
Frequently asked questions
How do I record my screen on a Mac with audio?
For your microphone, press Cmd + Shift + 5, open Options, and pick your mic before recording. For the sound your Mac itself is playing (a call, a video, an app), the built-in tools can't capture it on their own — you'd have to install a virtual audio driver first. Qumra records system audio and your microphone together with no extra setup.
Can I record internal (computer) audio on a Mac?
Not with the built-in Screenshot toolbar or QuickTime alone — macOS doesn't expose system audio to them, which is why demos recorded that way come out silent. Qumra captures system audio natively, so whatever your Mac is playing ends up in the recording.
Where do Mac screen recordings go?
Recordings made with Cmd + Shift + 5 save as .mov files to your Desktop by default (you can change the location under Options). QuickTime asks where to save when you're done. Qumra uploads while you record instead, so there's no file to manage — you get a share link the moment you stop.
Can I record just part of the screen on a Mac?
Yes. In the Cmd + Shift + 5 toolbar, choose "Record Selected Portion" and drag the frame over the area you want. Qumra can also capture your full screen, a single window, or a region you draw — and lets you switch between them without stopping the recording.
How do I stop a screen recording on a Mac?
Click the stop button that appears in the menu bar while recording, or press Cmd + Shift + 5 again and hit Stop. In Qumra, stopping is also the moment your share link becomes ready, because the upload happened while you recorded.
Is there a time limit when screen recording on a Mac?
The built-in tools record until you run out of disk space. Qumra's free plan includes up to 30 recordings of 5 minutes each; Premium ($14.99/month, 7-day free trial) removes the limits and adds full AI transcription and the video editor.
Keep exploring